Angular中组件之间的传值
文章目录
- Angular中组件之间的传值
- 前言
- 一、父亲向儿子传值
- 二、儿子向父亲传值
- 三、爷爷向孙子传值
- 四、兄弟之间的传值
前言
Angular的组件是构成应用的基础单元,它们封装了HTML模板、TypeScript代码以及CSS样式,以实现特定的功能。组件的目的是为了复用和减少代码的重复度。
以下是对Angular组件的详细介绍:
-
组件的组成:
HTML模板(Template):定义了组件的视图结构,用于展示数据并响应用户交互。
TypeScript代码(Script):包含组件的类定义、业务逻辑以及数据模型。这个类通常使用@Component()装饰器进行标记,装饰器中包含了组件的元数据,如选择器(Selector)、模板URL等。
CSS样式(Style):定义了组件的外观和样式。 -
组件的创建:
使用Angular CLI(命令行界面)可以快速创建组件。通过执行ng generate component 组件名命令,Angular CLI会自动生成组件所需的文件,包括.ts(TypeScript代码文件)、.html(HTML模板文件)和.css(CSS样式文件)。
手动创建组件时,需要分别创建这三个文件,并在TypeScript代码文件中使用@Component()装饰器来定义组件的元数据。 -
组件的核心任务:
将数据渲染到视图:组件负责将数据模型中的数据渲染到HTML模板中,以便在视图中展示给用户。
监听用户在视图上的操作:组件可以监听用户在视图上的各种操作(如点击、输入等),并执行相应的业务逻辑。 -
组件的复用:
Angular组件具有很好的复用性。一旦创建了一个组件,就可以在其他组件或应用程序中重复使用它,从而减少了代码的重复度,提高了开发效率。 -
依赖注入:
Angular组件可以通过依赖注入(Dependency Injection)机制来满足其执行功能所需的服务或对象。这使得组件可以更加灵活和可配置。
总的来说,Angular组件是构建复杂Web应用程序的关键部分。通过创建可复用的组件,开发人员可以更加高效地构建和维护代码库,并减少错误和重复工作。
一、父亲向儿子传值
首先使用命令创建两个组件,一个parent一个child
ng g component components/parent
ng g component components/child
@Input(): 用于从父组件接收数据。当你想在组件之间传递数据时,可以在子组件中使用@Input()装饰器来定义一个输入属性。父组件可以通过这个属性将数据传递给子组件。
parent.component.ts
import { Component, OnInit } from '@angular/core';
import { ChildComponent } from "../child/child.component";

@Component({
    selector: 'app-parent',
    standalone: true,
    templateUrl: './parent.component.html',
    styleUrl: './parent.component.css',
    imports: [ChildComponent]
})
export class ParentComponent  {
   value = 'parent的value';
}
parent.component.html
<p>parent works!</p>

<app-child [childValue]="value"></app-child>

<p>{{ value }}</p>

<p>parent works end!</p>
child.component.ts
import { Component, Input, EventEmitter , Output } from '@angular/core';

@Component({
  selector: 'app-child',
  standalone: true,
  imports: [],
  templateUrl: './child.component.html',
  styleUrl: './child.component.css'
})
export class ChildComponent {
  @Input() childValue:string = "Hello, I am child component.";
}
child.component.html
<p>child works!</p>

<p>{{childValue}}</p>

<p>child works end!</p>
最后在app.component.ts中引入ParentComponent
import { Component } from '@angular/core';
import { RouterOutlet } from '@angular/router';

import { ParentComponent } from './components/parent/parent.component';

@Component({
  selector: 'app-root',
  standalone: true,
  imports: [RouterOutlet,ParentComponent],
  templateUrl: './app.component.html',
  styleUrl: './app.component.css'
})
export class AppComponent {
  title = 'first-component';
}
在app.component.html中使用组件
<p>这个是app</p>

<app-parent></app-parent>
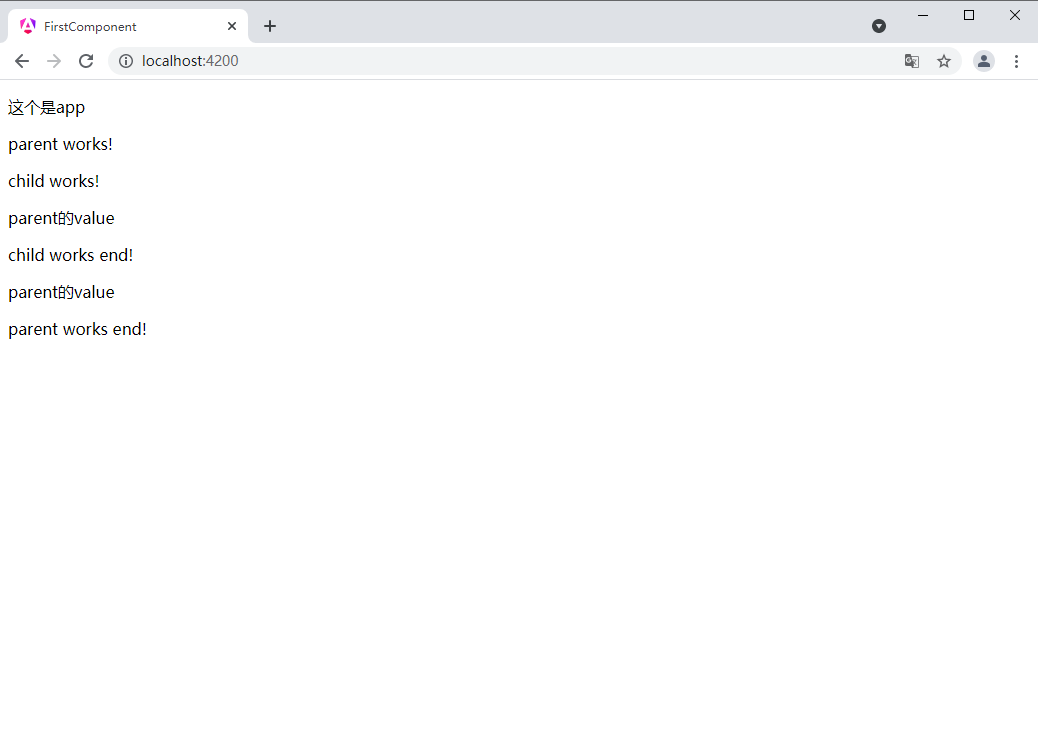
运行效果
二、儿子向父亲传值
@Output(): 用于从子组件发送事件到父组件。你可以使用@Output()装饰器来定义一个输出属性,并通过这个属性发出事件。父组件可以监听这个事件并作出响应。
child.component.ts
import { Component, Input, EventEmitter , Output } from '@angular/core';

@Component({
  selector: 'app-child',
  standalone: true,
  imports: [],
  templateUrl: './child.component.html',
  styleUrl: './child.component.css'
})
export class ChildComponent {

  @Input() childValue:string = "Hello, I am child component.";

  @Output() valueSend = new EventEmitter<string>();

  sendValue() {
    this.valueSend.emit('这是child组件发送的值');
  }
}
child.component.html
<p>child works!</p>

<p>{{childValue}}</p>

<button (click)="sendValue()">传给父组件</button>

<p>child works end!</p>
parent.component.ts
import { Component, OnInit } from '@angular/core';
import { ChildComponent } from "../child/child.component";

@Component({
    selector: 'app-parent',
    standalone: true,
    templateUrl: './parent.component.html',
    styleUrl: './parent.component.css',
    imports: [ChildComponent]
})
export class ParentComponent  {

   value = 'parent的value';
   iCount =1;

   receiveValue(value: string) {

    this.value=value + "" + this.iCount++;
    console.log(value);
  }
}
parent.component.html
<p>parent works!</p>

<app-child [childValue]="value" (valueSend)="receiveValue($event)"></app-child>

<p>{{ value }}</p>

<p>parent works end!</p>
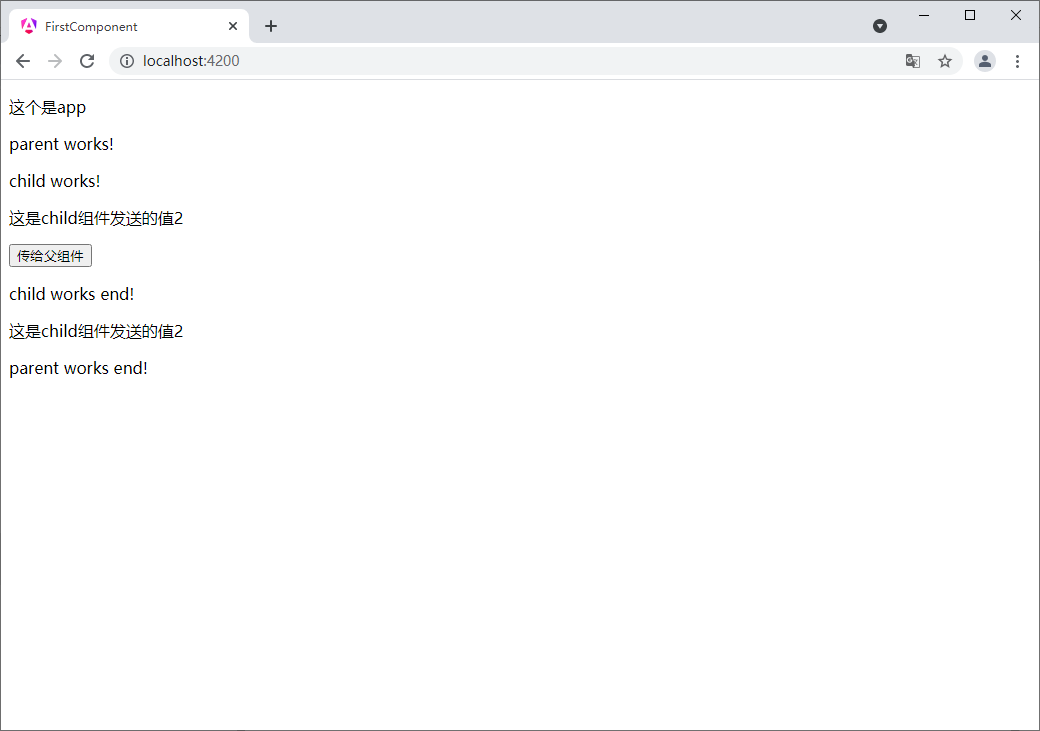
运行效果

点击按钮

三、爷爷向孙子传值
grandfather.component.ts
import { Component } from '@angular/core';
import { ParentComponent } from "../parent/parent.component";

@Component({
    selector: 'app-grandfather',
    standalone: true,
    templateUrl: './grandfather.component.html',
    styleUrl: './grandfather.component.css',
    imports: [ParentComponent]
})
export class GrandfatherComponent {
  grandfatherVaule = '爷爷组件的值';
}
grandfather.component.html
<p>grandfather works!</p>

<app-parent [grandparentValue]="grandfatherVaule"></app-parent>

<p>grandfather works end!</p>
parent.component.ts
import { Component, Input, OnInit } from '@angular/core';
import { ChildComponent } from "../child/child.component";

@Component({
    selector: 'app-parent',
    standalone: true,
    templateUrl: './parent.component.html',
    styleUrl: './parent.component.css',
    imports: [ChildComponent]
})
export class ParentComponent  {

   value = 'parent的value';
   iCount =1;

   @Input() grandparentValue: string = ''; // 假设这个值是从爷爷组件传入的


   receiveValue(value: string) {

    this.value=value + "" + this.iCount++;
    console.log(value);
  }

}
parent.component.html
<p>parent works!</p>
<app-child [parentValue]="grandparentValue"></app-child>
<p>{{ value }}</p>
<p>parent works end!</p>
child.component.ts
import { Component, Input, EventEmitter , Output } from '@angular/core';

@Component({
  selector: 'app-child',
  standalone: true,
  imports: [],
  templateUrl: './child.component.html',
  styleUrl: './child.component.css'
})
export class ChildComponent {

  @Input() childValue:string = "Hello, I am child component.";

  @Output() valueSend = new EventEmitter<string>();

  @Input() parentValue: string='';
  sendValue() {
    this.valueSend.emit('这是child组件发送的值');
  }
}
child.component.html
<p>child works!</p>

<p>{{childValue}}</p>

<button (click)="sendValue()">传给父组件</button>

<p>{{parentValue}}</p>

<p>child works end!</p>
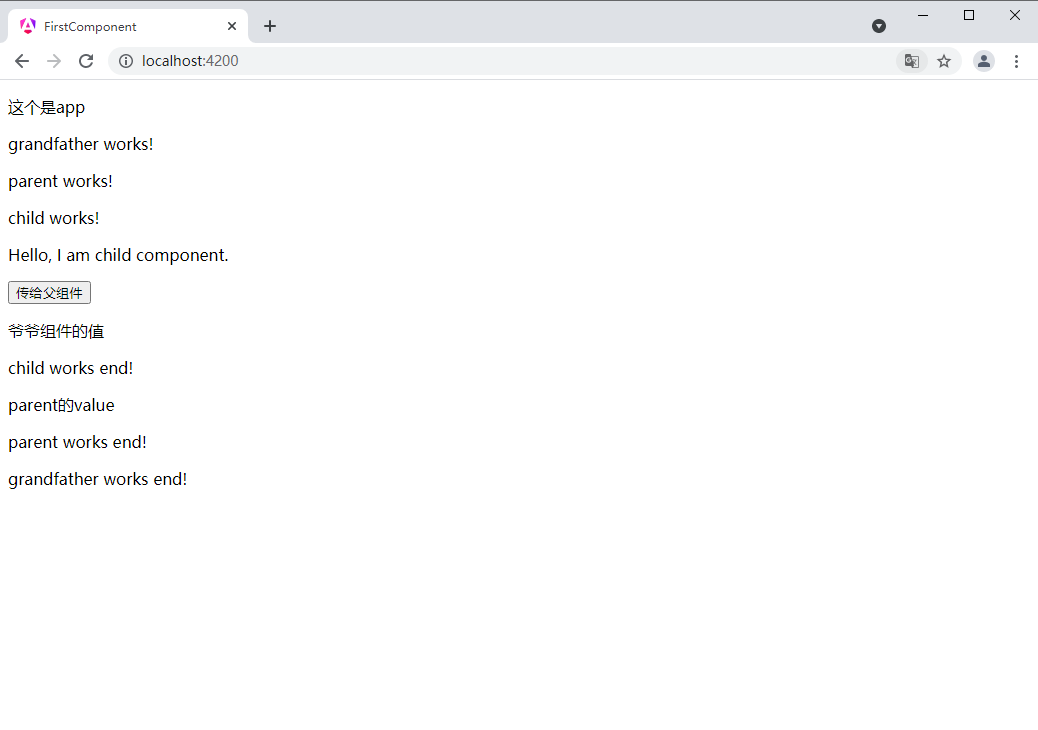
运行效果
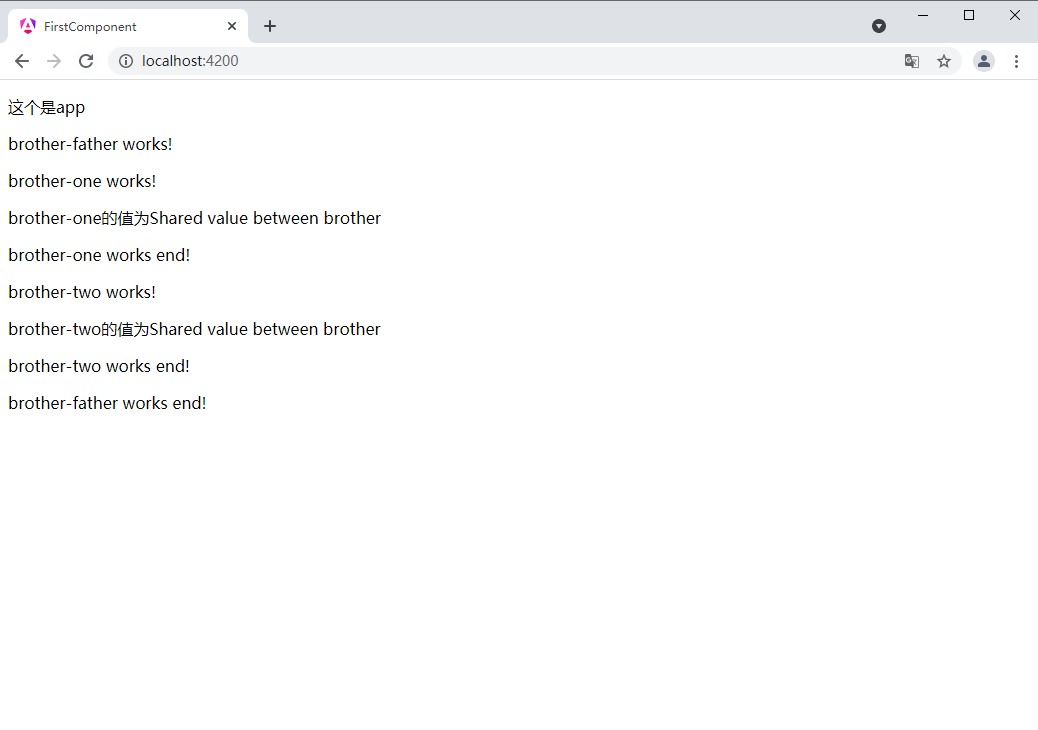
四、兄弟之间的传值
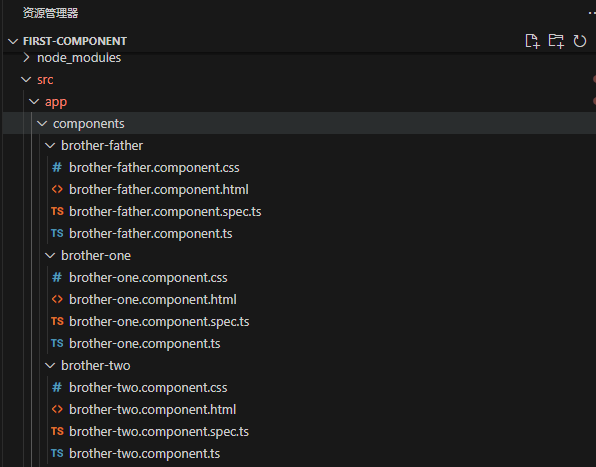
同样创建三个组件
brother-father.component.ts
import { Component } from '@angular/core';
import { BrotherOneComponent } from "../brother-one/brother-one.component";
import { BrotherTwoComponent } from "../brother-two/brother-two.component";

@Component({
    selector: 'app-brother-father',
    standalone: true,
    templateUrl: './brother-father.component.html',
    styleUrl: './brother-father.component.css',
    imports: [BrotherOneComponent, BrotherTwoComponent]
})
export class BrotherFatherComponent {
  receiveValue(value: string) {
    console.log(value); // 将打印 "Value from Child"
  }
  sharedValue = 'Shared value between brother';
}
brother-father.component.html
<p>brother-father works!</p>

<app-brother-one [sharedValue]="sharedValue"></app-brother-one>
<app-brother-two [sharedValue]="sharedValue"></app-brother-two>

<p>brother-father works end!</p>
brother-one.component.ts
import { Component, Input } from '@angular/core';

@Component({
  selector: 'app-brother-one',
  standalone: true,
  imports: [],
  templateUrl: './brother-one.component.html',
  styleUrl: './brother-one.component.css'
})
export class BrotherOneComponent {
  @Input() sharedValue: string='';
}
brother-one.component.html
<p>brother-one works!</p>

<p>brother-one的值为{{sharedValue}}</p>

<p>brother-one works end!</p>
brother-two.component.ts
import { Component,Input } from '@angular/core';

@Component({
  selector: 'app-brother-two',
  standalone: true,
  imports: [],
  templateUrl: './brother-two.component.html',
  styleUrl: './brother-two.component.css'
})
export class BrotherTwoComponent {
  @Input() sharedValue: string='';
}
brother-two.component.html
<p>brother-two works!</p>

<p>brother-two的值为{{sharedValue}}</p>

<p>brother-two works end!</p>
app.component.ts
import { Component } from '@angular/core';
import { RouterOutlet } from '@angular/router';
import { ParentComponent } from './components/parent/parent.component';
import { GrandfatherComponent } from "./components/grandfather/grandfather.component";
import { BrotherFatherComponent } from './components/brother-father/brother-father.component';

@Component({
    selector: 'app-root',
    standalone: true,
    templateUrl: './app.component.html',
    styleUrl: './app.component.css',
    imports: [RouterOutlet, ParentComponent, GrandfatherComponent,BrotherFatherComponent]
})
export class AppComponent {
  title = 'first-component';
}
parent.component.html
<p>parent works!</p>

<app-child [parentValue]="grandparentValue"></app-child>

<p>{{ value }}</p>

<p>parent works end!</p>
运行效果